This module for SYMPOSIUM Events allows your University to use its own Zoom account integrated in the management platform and in the flow of your events. You can provide the events with Webinar sessions with automated reservation management and also have Webinar sessions with manual control.
- Event organizers will receive unique credentials to open their Webinar sessions.
- Registered attendees to the events will receive a link to join the Webinar sessions.
- At the end of each Webinar session, the platform will automatically generate the attendance report.
For this module to work in your Events management platform you have to authorise SYMPOSIUM Events app -published in the Zoom Marketplace- in your Zoom account.
Index
- How does the app work
- A visual tour
- How to install and setup Symposium Events app
- How to uninstall Symposium Events app
- How to manage active Webinar sessions
- How to schedule a Webinar within an event with Symposium
- Get reports of past Webinars
- Support
How does the app work
The integration model for Zoom accounts in Symposium Events is about the «Webinar sessions available for your event organizers» concept.
A Zoom master account can contain multiple users (subaccounts). In the integration model with Symposium, these users can provide Webinar sessions that are made available to all the organizers of the University’s event management platform. When an organizer asks for one Webinar session, Symposium provides them with a valid password only for that Webinar session. When finished, the password expires and frees the user.
Symposium cannot create nor delete users in your Zoom master account. Instead of that, Symposium gets a list of the users and manage them as Webinar sessions providers. As an administrator, you decide how many of them are made available.
At first, the Webinar sessions providers (the users within your account) are deactivated. For your event organizers to be able to request one of them, you have to activate one user at least.
A visual tour
Please, watch this video. There we show a step by step demo about how the SYMPOSIUM Events app integration.
Prerequisites for linking a Zoom account
- A Symposium License for your University.
- You are the admin on a Zoom account and the admin on your Symposium Events platform.
- In your Zoom account there is at least one user with license for Zoom Webinars.
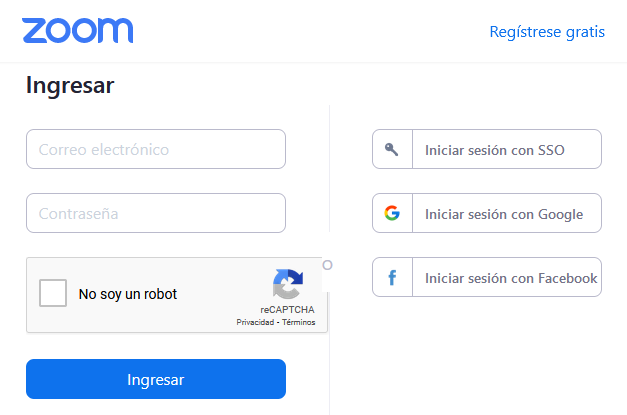
- Be sure to log out of the Zoom portal in the browser you are using, if you used any other account.
How to install and setup Symposium Events app
Step 1: Linking your Zoom account
Login in your Symposium Events platform. Then navigate to Management -> Webinars -> Manage Zoom account. There you can link the master account:

In the block Manage link to Zoom account you will find a button Link account.
Click on the Link account button and Symposium will take you to the Zoom portal. Login with the master account to authorize Symposium to manage it.
The app needs access to your account. Before you authorize the app installation you will see information about its scope.
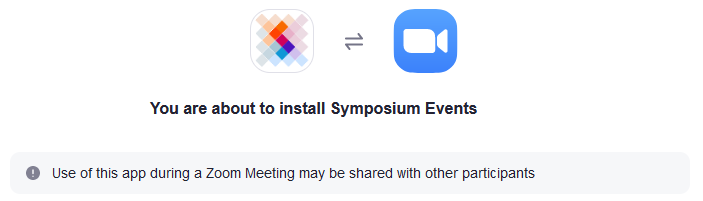
Please carefully read the scope of the app and the permissions it needs.
Once the account is linked, you will return to the platform. Click on Manage link to Zoom account block and you will see a list of the Zoom users into the master account. From now on, we will refer Webinar Sessions Providers to these users.

Step 2: Activate the Webinar Sessions Providers in Symposium
The list shows all the available Webinar Sessions Providers (users) in the Zoom master account. In order for the events platform to manage reservations with a Webinar session, it is necessary that you activate it. Therefore, you can activate them all or only the ones you consider. For each Webinar Session Provider (user) there is a button called Activate. When a Webinar Session Provider is activated you can change the password for that user.

Step 3: Setting the Assignment Mode
Webinar Sessions Providers (users) can operate in two modes, manual and automatic. Indicate for each one in which mode you want it to work.
- The automatic Webinar Sessions Providers will be authorized to the applicants immediately, as long as they are free at the time requested.
- Manual Webinar Sessions Providers can only be authorized by a platform administrator to a requester.
You can deactivate Webinar Sessions Providers, as long as they do not have a webinar assigned.
Step 4: Configuration
This is an optional step. It allows you to set some limits in the use of Webinar Sessions Providers. If you do not indicate specific limits, the generic Symposium limits will apply.
- Maximum and Minimum number of days in advance to reserve Webinar Sessions (by default, max 60 and min 0, it means you can make a reservation for the next minute).
- Maximum duration and Minimum ( in minutes) that the Webinar Sessions will have(by default, max 240 minutes, min 30 minutes).
- Preparation time in minutes for organizers and panelists to do video and audio tests before participants can enter (by default 30 minutes).
- Complimentary time in minutes that is added to the total duration of the webinar to finalize the conclusions of the session (by default 15 minutes).
How to uninstall Symposium Events app
It is possible that at some point, you want to deactivate your Zoom account on your platform. This means that you will not be able to use your Zoom account in the events and that the Webinar Sessions that were already reserved will never start. You will no longer have access to usage and attendee reports for Webinar Sessions that have been held in the past.
Step 1: Unlink the account
In your Symposium platform go to the Management > Webinars> Manage Zoom account. In the Manage link with Zoom account block, click the Unlink account button.
Step 2: Confirm that you want to unlink the account
Symposium will ask you twice if you agree to unlink the account. Remember that by doing so, Symposium will no longer have access to your Zoom account and it will have to delete all the Webinar Sessions scheduled in the future, it will abruptly close the Webinar Sessions that were in progress and delete the information about the Webinar Sessions already held.
Step 3: in the Zoom portal, uninstall the app
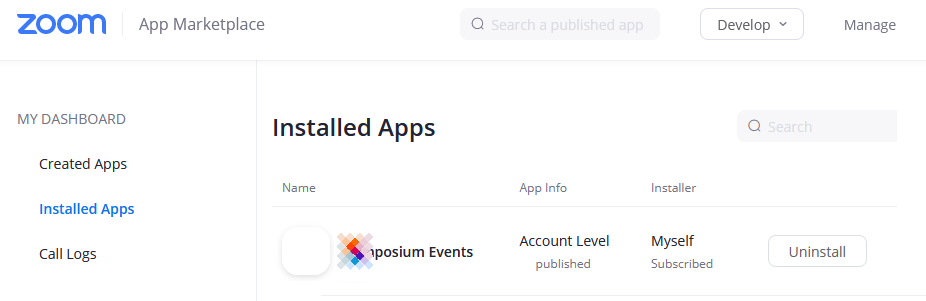
- Symposium will take you to the Zoom Marketplace portal. Login with your account and look in the menu on the left for «Installed apps».
- Locate Symposium Events in the list of installed applications and click on the Uninstall button.
- Confirm the uninstallation. Zoom will ask you the reason for doing it and, optionally, if you want to leave the data in Symposium.
- If you do not allow us to leave the data in your Symposium platform, we will be notified to delete everything and we will do it.
- If you allow the data to continue on your Symposium platform, we will save the attendance reports and the information about past webinars.
- When you return to Symposum, you will no longer have access to the Webinar Sessions list.
IMPORTANT: If you re-Link the same Zoom account in the future, you will still not have access to data from past Webinar Sessions.
How to manage active Webinar sessions
Assingnment mode
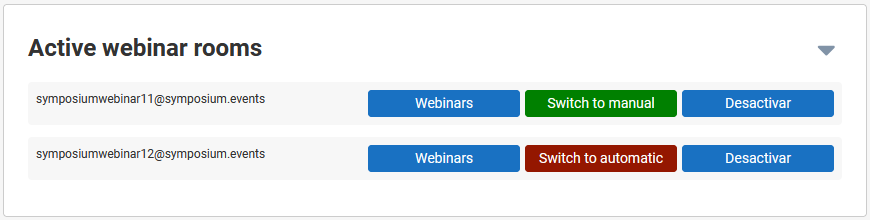
Login into your Symposium platform. Navigate to Management > Webinars > Manage Zoom account > Active Webinar Sessions.
This list shows all the active Webinar Sessions that are available to University’s event organizers.
Webinar Sessions can operate in two modes: manual and automatic.
- Automatic mode: the platform authorizes the use of the Webinar Sessions to whoever requests it, if it is available in the requested time slot;
- Manual mode: the Webinar Sessions request can only be authorized by a platform administrator. It is also possible to reassign it to a webinar that has already been assigned another Webinar Sessions.
By default, active Webinar Sessions are set to manual mode. Activate the automatic mode for the Webinar Sessions that you want to be available without the need for an administrator to intervene.
It is also possible to change the assignment mode to Manual for a Webinar Sessions Providers that is on Automatic, as long as they do not have any webinar reservations.
List of scheduled webinars
If some Webinar Sessions Providers has scheduled Webinar Sessions, as an administrator you can get a list of them. Clic on the Webinars button. The list shows the starting date, title, event id and the time in which that Webinar Session is blocked. The Edit button shows the same information and lets you to reassign the Webinar to another Webinar Session.
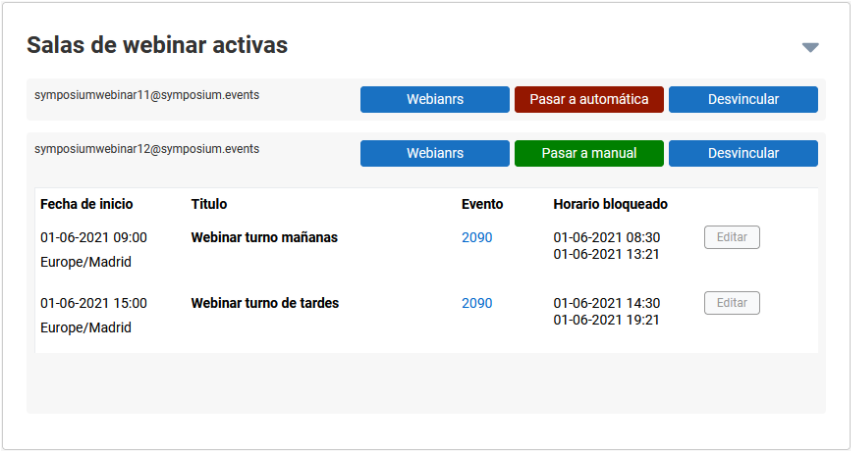
IMPORTANT: Webinar Session reassignment means deleting the Webinar and re-creating it in another Webinar Sessions Provider. If the Webinar Sessions had designated panelists, the organizer will need to invite them again and the link they received will no longer work.
Deactivate a Webinar Sessions Provider (a user)
Also you can deactivate a Webinar Sessions Provider. It will no longer be available. As long as it is part of the main Zoom account, you will find it in the «Manage link with Zoom account» block, from where you can reactivate it.
You will not be able to deactivate Webinar Sessions Providers that have Webinar Sessions already scheduled.
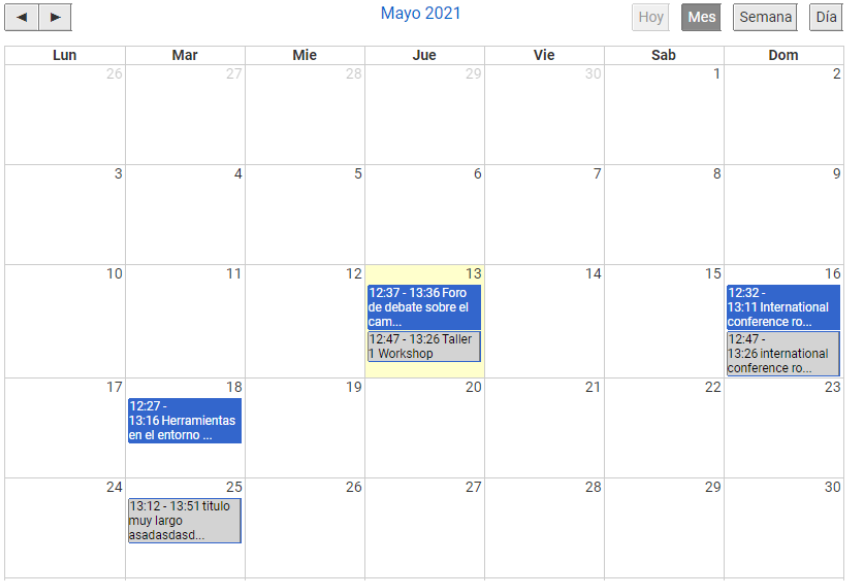
Scheduled webinars in a calendar layout
The block Calendar shows the same information about scheduled Webinars in the form of a calendar.
- Webinar Sessions pending assignment (in grey)
- In progress (in blue)
- Scheduled in the future (in blue)
The Webinars that are going to start block shows you the Webinars that are about to start but for those that have not yet generated the host credentials. Generating these credentials takes a few seconds so it is normal for this list to be empty. If for any reason the process for generating the credentials is delayed or seems not to work you can launch it from here.
Requests pending Webinar Session assignment
There is another block called Unassigned Webinar Session requests. In this list, you will find the Webinar Session requests that are waiting for assignation to a Webinar Session Provider. You can attend them with two buttons:
- Automatic assignment: an attempt will be made to assign one of the Webinar Sessions Providers that is in automatic mode. It is possible that a Webinar Sessions request is on the list because there are no Webinar Sessions Providers available at that time.
- Manual assignment: you can assign any of the Webinar Sessions Providers to the webinar request. If the one you are trying to assign is not available at the requested time, you will see the notice that the assignment could not be made. You can try assigning another Webinar Sessions Provider.
When the time slot of a Webinar Session request is not available in any of the platform’s Webinar Sessions Providers, you can:
- Contact the applicant to delete the Webinar Session request and then make a new request at other date or hour.
- Go to your Zoom master account and hire a new user with Zoom Webinars license. When you return to Symposium, you will find it in the «Manage link with Zoom account» block and you can activate it on the platform, either in manual mode or in automatic mode. Finally, you will be able to assign this new Webinar Sessions Provider to the Webinar Session request.

Limits for your event organizers
The Configuration block lets you to setup some values that will be applied to all webinars on the platform:
- Maximum and minimum days in advance to reserve Webinar Sessions
- Maximum and minimum duration in minutes that the Webinar Sessions will have
- Preparation time in which the credentials will be generated for the new hosts
- Time courtesy that is added to the total duration of the Webinar Session to finalize the conclusions of the session.
How to schedule a Webinar within an event with Symposium
Requesting a Webinar Session
Login into the platform as an event organizer or as an administrator. In the menu My events look for your event into the block Upcoming Events and click on the Edit button.

Navigate to Content > Schedule / Webinars and look for the block Webinar Sessions. Then click on the Add a webinar button.

You will see a modal form. Write the title for the Webinar, the starting date and time, the duration on minutes and click on Request button.
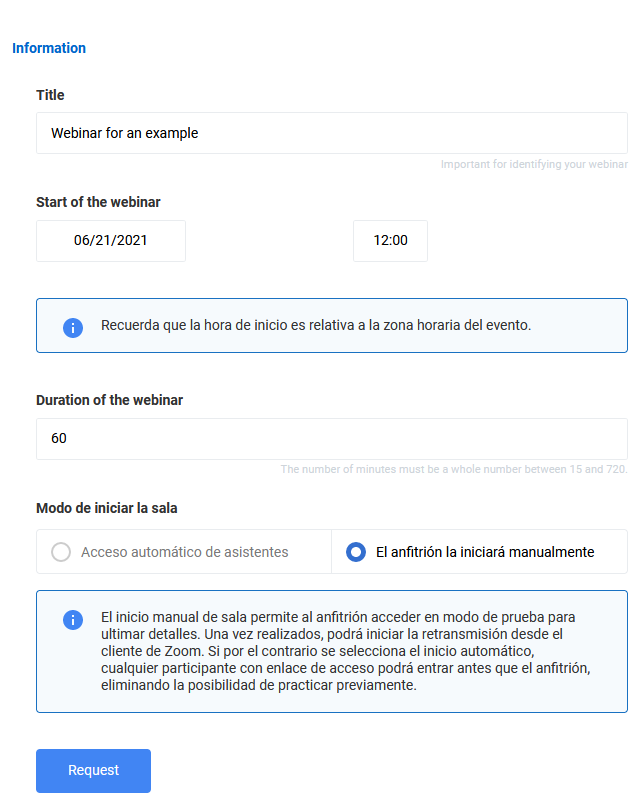
When you click on the Request button, Symposium will look for a free Webinar Session Provider to assign it to your request. If there is a free Webinar Sessions Providers you will see the Link word and the title in bold. Your Webinar Session is now ready to start at the time you scheduled it.
Adding panelists to the Webinar
Within the event management you can send invitations to the speakers of the Webinar by clicking on the Speakers button. For each speaker (Zoom calls then Panelists) click on the Add speaker and write his/her name and email. Check the legal clasue (you must get consent from the speakers to send this data to Zoom).
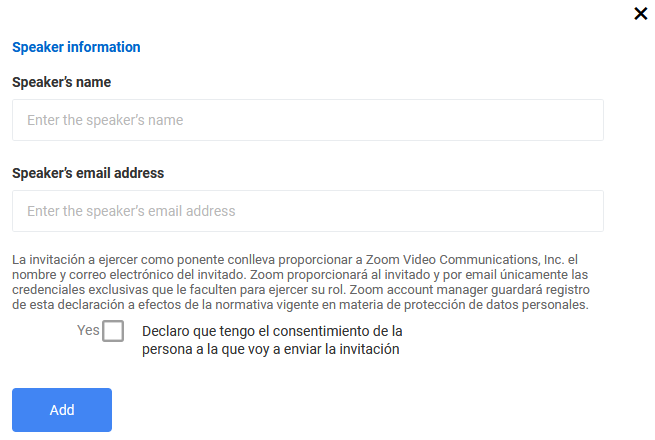
Speakers (or panelists) will receive an emai with a link to enter de Webinar with the panelist rol. They can send audio, video and share their desktop from the beginning of the session.
Receiving data for you to start a Webinar session
A few minutes before the Webinar starts (it depends on the configuration made by the platform’s Admins) the requester will receive an email with:
- a link for opening the Webinar Session
- a username
- a password
These data will be temporary available in the menu Content > Schedule / Webinars page, too.

The assistants will receive an email with only the link to join the Webinar. They can also get that link by login in the platform with their username and personal password.
Get reports of past Webinars
As an platform administrator you can get reports of past webinars. Login to the platform and navigate to Management > Webinars > Webinar reports.
You will see a list of the past Webinars performed within the events of the University’s event platform. Only reports of really performed Webinars are available (Webinars that where started and had al least one participant). Just clic on Download to get a report in Excel format.

If you see the button Request it is possible that there is no report. If the Webinar didn’t really start or didn’t have attendees there will be no report. But also it is possible some went wrong in the automatic procedure that requested the report. If there were attendees you can click on the Request button and wait a few minutes. Then reload the page and you will see the Download button. If you see Request again o «Error» please don’t try this anymore. If Zoom didn’t generate the report your event platform will also never get it.
Getting support
For any question, please contact us in support@symposium.events or throught our Support center (Spanish).